Contents
Migrating a WooCommerce site to a new server can seem daunting, but with the right approach, it can be smooth and error-free. There are several reasons for migrating, whether it’s to improve site speed, handle higher traffic volumes, or reduce hosting costs.
Moving a WooCommerce store to a new server may thus seem too daunting; however, with the proper approach, smooth and error-free migration can be made. The reasons for migration vary: It could be for an enhancement in the site speed, to look after increased traffic volume, or just to bring down the host’s charges.
The guide will go into every step in detail, thereby making the conversion of the WooCommerce store smooth for running well afterward.
Pre-Migration Preparations
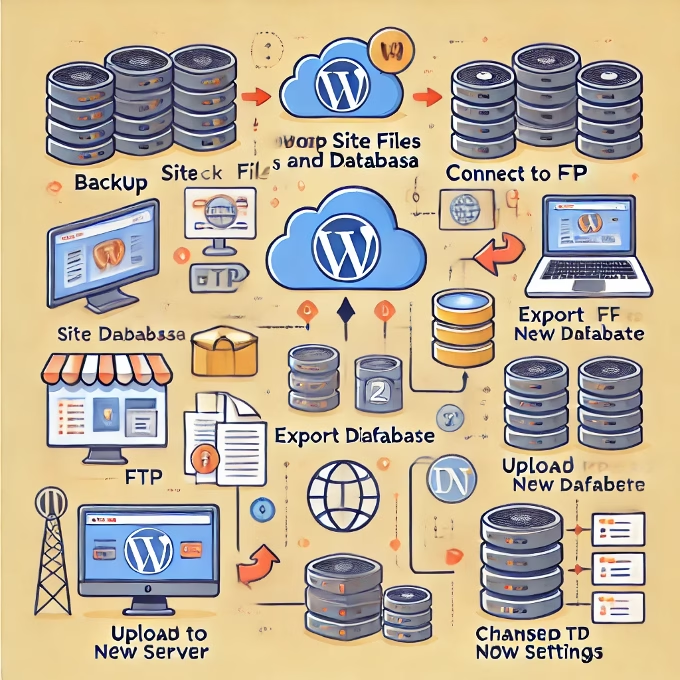
Backup Your WooCommerce Store
Before starting with the migration steps, it is required to have a full backup of your entire WooCommerce site. A backup will serve you if anything does go wrong during the transfer, allowing you to get back to your site in its former state.
You want to back up:
– Database: It contains product details, order details, customer details, all settings of the whole site.
– Files: theme, plugin, image, and other media files.
There are several WordPress and WooCommerce backup plugins, such as UpdraftPlus, BackupBuddy, and Duplicator. These plugins form the easiest way to take a backup and restore if in need.
Select a New Server or Hosting Provider
When moving to a new server for the sake of better performance, ensure that the new server meets WooCommerce requirements. In keyword, look for the hosting provider providing:- WooCommerce optimization (caching, CDN options)
– WooCommerce optimization (caching, CDN options)
– High-performance servers (good CPU, RAM)
– Sufficient storage capacity and bandwidth.
Namecheap, SiteGround, Bluehost, and Kinsta are some popular options..
Setting Up the New Server Environment
This preparation is about establishing your new server to be identical to your current setup. It includes, but is not necessarily limited to:
– Setting up the original server’s PHP version.
– Installing MySQL or any other relevant database software.
– Setting up permissions for WordPress and WooCommerce.
Several hosts also come with simple one-click installation procedures for WordPress; this definitely makes the environment setup very easy.
Migration Methods for WooCommerce
There are many ways to do a migration and each has its own advantages and disadvantages.
By FTP and phpMyAdmin
1. FTP migration can be done like this: Backing Up Files: Back up the files present on your server: the WordPress files, plus the `wp-content`, which contains your themes, plugins, and uploads.
2. Exporting WooCommerce Database:
– Export through phpMyAdmin using cPanel or a hosting-provided URL.
– Select the database to be exported, and choose `.sql` with Quick as an Export method with Format as SQL.
3. Files Uploading to the New Server:
– With FTP, connect to the new server and upload those files from the preexisting one.
– Try to upload them into the root directory of your new hosting environment.
4. Database Import:
– On your new server open phpMyAdmin, create a new database, and import the recently exported `.sql` file.
– All database details, such as name, username, password, and host, must be changed in the `wp-config.php` file.
5. Updating the Permalinks and Configurations:
– Login to the WordPress dashboard on your specified server, then navigate to Settings > Permalinks to save it and allow URLs to function properly.
– Also, check site-specific configurations like hard-coded URLs and update accordingly.
Using a Migration Plugin (Recommended)
Using migration plugins can allow ease of transfer by quite a few of the file and database transfers being automated.
1. Pick a Plugin: Options like All-in-One WP Migration, WP Migrate DB, and Duplicator are some commonly used options for WooCommerce migration.
2. Install and Set Up the Plugin:
– Install the plugin on your old site, and follow the steps to export the entire site (including the database).
– Download the migration package provided by the plugin.
3. Plugin Installation on the New Server:
– WordPress, together with the migration plugin, needs to be installed on the new server.
– The downloaded site package should then be imported through the plugin.
4. Check Database and File Transfers
– The next step, post-import, is to verify that the import of files and databases actually has taken place. Regarding the WooCommerce data, verify that products, orders, and customer data have gone there.
After the Migration
Update the DNS Settings
Following migration, update the DNS settings for the domain to point to the new server. It might be that you need to update the A record or CNAME record at the domain provider to the IP address of your new server. DNS changes take 48 hours to propagate worldwide, but they rarely need that long; propagation normally completes faster.
Test WooCommerce Store
Prior to making it live, run a battery of tests on your WooCommerce store on your new server. Some of the important things to test are:
-Product pages: All products should be visible, along with their respective correct product details.
– Cart and checkout: Perform test checkout scenarios.
– Order processing and emails: Check for order notifications and confirmation emails.
– Payment gateways: Test your payment gateways, such as PayPal and Stripe, to ensure that transactions are smooth.
Broken Links and Images Check
During migration, URLs may break, especially if they are hardcoded. Use Broken Link Checker or Screaming Frog SEO Spider and fix the broken links.
SSL Certificate Update
If the SSL certificate was installed in the old server, it will have to be installed on the new server so that SSL may operate. Most hosts will issue a certificate free of charge through Let’s Encrypt, or you can reinstall your paid certificate if you had one.
Update Caching and Permalinks
Caching plugins and permalinks settings can sometimes need adjustments after migration:
– Caching Plugins: Reinstall and configure caching plugins like WP Super Cache or W3 Total Cache if needed.
– Permalinks: As noted earlier, save your permalinks structure to ensure URLs function correctly.
SEO and Analytics Checks
For search rank and traffic insight maintenance purposes:
– Check the Robots.txt File: Allow search engines to crawl your site by checking the robots.txt file.
– Verify Google Analytics and Search Console: Double check that Google Analytics tracking is working and submit your updated site to Google Search Console.
Troubleshooting Common Migration Issues
Mistaken Broken Links and Missing Images
Broken links and images may just mean some URLs are not right in the database. Using a script like Better Search Replace may help to find the old URLs and replace them with new server URLs.
Error Establishing Database Connection
Once error establishing connection might appear when trying to start the site. You should double-check to ensure that the credentials in the wp-config.php file are those of the new database.
Slow Site Performance
If the site loads slower on the new server you may need to enable caching, optimize images, and also ensure the new server has the resources necessary.
Missing Plugins or Themes
If plugins or themes are missing, check that they were transferred in the migration procedure; you may have to reinstall a few of them.
The process of migrating a WooCommerce site to a new server requires careful planning and execution so that the migration is smooth. Following these steps will ensure that your store migrates without affecting functionality, losing data, or impacting user experience. Remember consistently to back up your data, choose strong migration tools, and test your site after migration to identify immediate problems. With this approach, your WooCommerce store will migrate with ease and better performance on its new server.