
Contents
- 1 What Is Elementor and How Does It Work?
- 2
- 3 Elementor features
- 4 How do I add custom fonts to Elementor?
- 5 Let a pro handle the details
- 6 How do I use the Elementor page-builder?
- 7
- 8 What are the best Elementor templates?
- 9 How do I install and activate Elementor?
- 10
- 11 How do I add custom fonts to Elementor?
- 12
- 13 What are the pros and cons of using Elementor?
- 14
- 15 Can Elementor be used with any WordPress theme?
- 16 How much does Elementor cost for a single website?
- 17
- 18 What are the best Elementor add-ons?
- 19
- 20 How do I make a responsive site in Elementor?
What Is Elementor and How Does It Work?
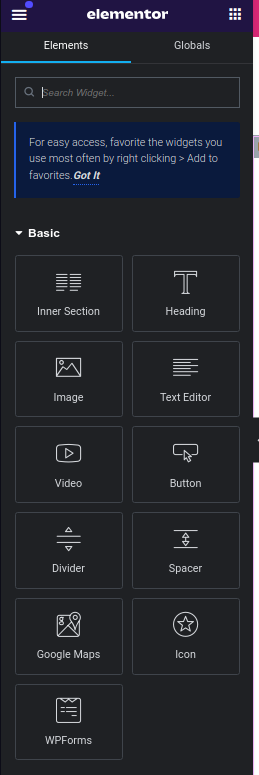
Elementor gives the freedom to build websites without touching code. It is a WordPress site builder, and instead of using the default WordPress editor, one can drag and drop elements provided by Elementor with live visual editing.
You can use Elementor to design layouts for your website or choose from numerous pre-designed layouts. You can add a variety of widgets and elements such as texts, images, buttons, sliders, and more to choose from. These elements can also be styled by the users, changing fonts, colors, spacing, and other styling parameters.

Elementor features
Drag-and-drop: To place any element, it is as simple as dragging it across the canvas. Select and move objects to cast shadows, set elements, or bring minor changes.
Live Editing: The design can be seen sometime while working on that design, i.e., whatever change you make in the Elementor editor immediately reflects on the frontend.
Mobile responsiveness:The options show that in Elementor , you can design multiple layouts for tablets, phones, and desktops, so the website truly looks cool on all of them.
Template Library: It has a huge library of more than hundreds of ready-to-use templates for different types of pages, keeping things really simple and fast with Elementor.
WordPress Integration: Due to its integration, Elementor users no longer found it hard to control thinking well about their WordPress sites.
The web designing process gets easier with Elementor through an easy-to-use graphic interface that allows users to make nice-looking websites without much technical knowledge.
Use the contact form below to make Elementor faster.
How do I add custom fonts to Elementor?
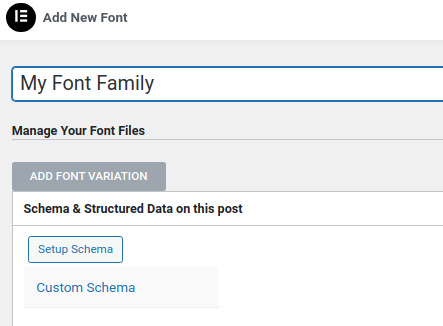
- First, make sure you have the font files you want to use. Typically, the font files should be in the right format (.ttf, .otf, .woff, or .woff2). Next, log in to your WordPress dashboard and select the Elementor option. From there, click on Custom Fonts.
- The next step is to click Add Font after selecting the font format that corresponds with that of your font files.
- Fill in the “Font Family” field with your custom font name.
Under “Font Weight,” select the weight(s) applicable to your chosen font.
Upload the font files you downloaded in step one.
Click Publish to save the changes after the font files are uploaded.
Let a pro handle the details
How do I use the Elementor page-builder?
Install Elementor: On your WordPress site, you must install and activate this plugin if you haven’t done so already. For this, go to “Plugins” on your WordPress dashboard; click “Add New,” type “Elementor,” and click “Install Now” and then “Activate.”
Create a Page: After activation, you can either work on a new page or modify an existing one with Elementor. Go to “Pages” in your WordPress dashboard, and select “Add New,” or hover over an existing page and click “Edit.”
Invoke Elementor on the Page: Once you are on the page you want to work with, you have the option to click the “Edit with Elementor” button at the top of the page. The Elementor editor would then open from there.

Making Use of the Editor
The Elementor panel, which has settings and widgets, is located on the left.
To add text, photos, buttons, and other items to the page canvas, drag and drop widgets from the panel onto the canvas.
To change an element’s style or content, click on it anywhere on the canvas. The editing options will show up on the left side.
Adding sections and columns to the page will allow you to change its layout as well. To add a new section, click the “+” button and drag columns into it as needed.

After making all the necessary edits, preview the page to check how it appears to users. If satisfied, click Publish to make the changes permanent.
To preview or undo/redo changes and more, use the toolbar present up top or at the bottom left.
Personalize options: Set Options for the Personalization of Page Layout, Style, and Additional Options on the Left Panel. Your Work Is Awaiting Customization.
After making all the necessary edits, you can preview the page to see how it appears to users. Then, click “Publish” to make the changes permanent. To make your changes live, click the “Publish” button if you’re satisfied.
Advanced Features: In Elementor, you have so many advanced things to play with, including theme builders, global widgets, templates, and dozens of others. Check out these features to uplift the overall appearance and experience of his site.
Saving and Storing Templates: You can save designs as templates with Elementor Pro. These templates can then be used on different pages of your show or even on another website.
What are the best Elementor templates?
An individual might go for any of the best Elementor templates considering personal choices and needs.
Kava Pro: is a multipurpose theme having upwards of 77-section templates which allow users to create virtually any kind of website.
OceanWP: Next is a lightweight yet highly customizable theme that is compatible with Elementor. It offers about 130 pre-designed templates with different ways to design.
Neve: A fast, responsive theme custom-built for Elementor, in which users can pick from 80-plus pre-designed templates and alter them however they want.
Hello Theme: Another lightweight and simple theme that works best alongside Elementor. It is so customizable that it is almost like a blank canvas for its users to develop their own website.
Phlox Pro: A somewhat new and relatively modern setup with 80+ ready-made templates and optimization levels with regard to layout, typography, and color. Phlox Pro supports integration with WooCommerce and other WordPress plug-ins.
How do I install and activate Elementor?
- Login into your WordPress dashboard.
- From the left sidebar, go to “Plugins” and press “Add New”.
- For searching, type “Elementor” and hit Enter.
- You will look for the “Elementor Website Builder” plugin in the results.
- Click on “Install Now” beside the Elementor plugin.
- Once installed, you should click on “Activate” to activate it.
- After activating Elementor, you can visit all the pages where the Elementor editor is invoked to build your website from there. By default, Elementor will add options within the WordPress editor wherein, for each page or post, you have the choice of editing with either Elementor or the standard WordPress editor.
Elementor supports WordPress 5.0 or newer; it’s compatible with almost all modern WordPress themes. And it is always a good idea for you to keep the WordPress and Elementor updated for security and compatibility.
If you find yourself experiencing any issues during the installation or activation, you can reach out to the Elementor support or read through the documentation for help.
How do I add custom fonts to Elementor?
- You will need an Elementor Pro license.
- Download the font files you want to use. The font files are in the appropriate formats (usually .ttf, .otf, .woff, or .woff2).
- Go to the “Elementor” Pro left menu. Click on “Custom Fonts” to access the custom font settings.
- Choose the font format that matches your font files, and click on the “Add Font” button.
- In the “Font Family” field, give a name to your custom font.
6. Under “Weight”, specify the font weight(s) you want to use.
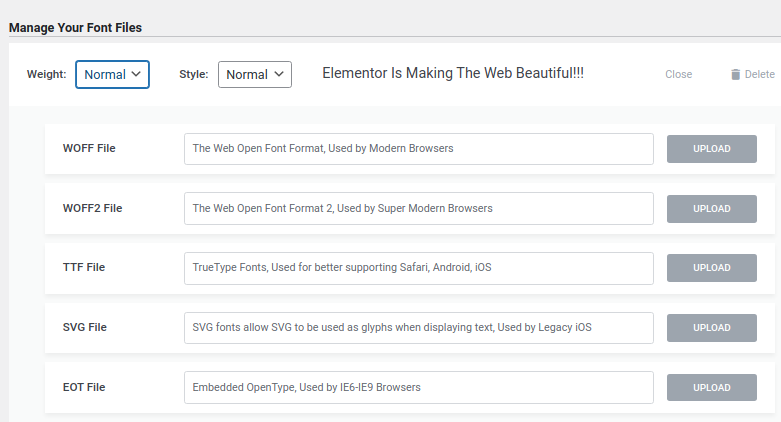
7. Click on the “Upload” button to upload the font files you downloaded in step 11.
8. After uploading the font files, click on the “Publish” button to save the changes.
What are the pros and cons of using Elementor?
Pros:
- Ease of use: The interface along with the drag and drop facility in Elementor is very easy and simple, so a beginner or a person with some knowledge can easily work on it.
- Functionality: Elementor gets you bucket loads of templates that are pre-built or totally custom-made, interspersed with widgets and design elements you can choose from for your website layout.
- Customization: In effect, every single aspect of your website, from font to color to background images and even animations, can be helmed by you if you so desire via Elementor.
- Price/value: So, recently, they have a free version with pretty helpful features that might suffice for many people. You can also upgrade to Pro with some advanced designs and features along with premium support.
- Integration capabilities: Giving you the power to enhance functionality and flexibility is the integration of Elementor with many WordPress plugins and third-party tools.
- Responsive design: It is time to optimize your website for multiple devices with Elementor, where it defines responsive behavior to keep websites compatible across desktops, tablets, and mobiles.
Cons:
- Performance/site speed issues: Using Elementor might slow down your website if not optimized properly, especially if you use a lot of complex elements and animations. Important to note here, I don’t use Elementor in any of my blogs due to the many bugs and heavy scripts. I do debug it on client sites and believe me I have seen dozens of bugs!!! As to animations I never take projects to speed up Elementor sites that have heavy animations. I don’t mean simply a button hover and the likes, but heavy animations on the entire page.
Okay, so it’s a big no; those owners better rebuild their pages than have me optimize them with the animations intact. Click here to find out how you can speed up Elementor. - Glitches/headaches with their respective updates: Some users have reported issues with compatibility and glitches after updating Elementor to new versions, which may need troubleshooting and bug fixing. This part is ridiculous and unprofessional coming from the Elementor dev team. It has developed almost to a commonality, Every time we update we ask ourselves, “What have I broken again?”, not asking IF anymore, but WHEN like… “When will I find out the new issue between hundreds of my pages?”.
Can Elementor be used with any WordPress theme?
In short, Elementor may work with most WordPress themes if they are properly designed following WordPress requirements. That said, there are certain themes that might not really want to make working for Elementor and might need some coding or adjustment.
Hence the answer to “Does Elementor work with any WordPress theme” sits on the particular real theme and how it was made for it. However, there is that official support and documentation available from the official developer side to assist those users that try to interface the Builder Page with their WordPress theme and solve incompatibilities. The answer is just Go and see our videos and read our documentation.
How much does Elementor cost for a single website?
- Essential Plan: This plan is suitable for one website and costs $59 per year.
- Advanced Plan: This plan is suitable for three websites and costs $99 per year.
- Expert Plan: This plan is suitable for 25 websites and costs $199 per year.
- Agency Plan: suitable for 1000 websites and costs $399 per year.
Read about the plans here
What are the best Elementor add-ons?
Important Add-ons for Elementor: Allowing far-reaching extensions and features such as timelines, flip boxes, testimonials, post grids, and others, the Important Addons for Elementor is one such add-on. It comprises of premium features that may be opted for, however a free version is also kept up to-date. Careful, this add-on (plugin) has been exploited to inject malware into websites.
Happy Addons for Elementor: This add-on provides a wide range of elements and functionalities, including display conditions, live copy functionality, and cross-domain copy-paste. There is a pro edition that offers more features than the free version.
Premium Addons for Elementor: The Premium Addons plugin comes with several widgets, including team members, price tables, progress bars, and more. It provides both free and paid versions and is renowned for its elegant design options.
Dynamic Content for Elementor: With the help of this Elementor add-on, you may dynamically alter content in response to user interactions, time, and other factors. It’s very helpful for building customized and dynamic web pages.
Elementor Extras: With features like dynamic galleries, post timelines, and a potent extensions manager, Elementor Extras expands the capabilities of Elementor. While certain features are exclusive to the premium edition, others are available for free.
JetElements: Designed by Crocoblock, JetElements enhances Elementor with a variety of widgets and features, including complex carousels, price tables, and elements exclusive to WooCommerce. It is included in the JetPlugins package. It’s a heavy add-on and not suitable for speed.
Livemesh Addons for Elementor: This add-on offers a variety of features and widgets, including testimonials, services, and post grids. It’s made to integrate easily with Elementor.
PowerPack for Elementor: PowerPack gives Elementor access to imaginative and distinctive widgets like dual headers, particle backdrops, and hotspots. It comes in a free and paid edition, and it is packed with features.
Checking reviews, updates, and support options is a good idea to make sure it works with the version of Elementor you have and is reliable over the long run.
How do I make a responsive site in Elementor?
- Select a Responsive Theme: First of all, choose a responsive WordPress theme. By selecting a responsive theme, the layout of your website adjusts according to the screen size of the device on which it is being viewed.
- Enable Responsive Editing Built in Elementor: This allows one to preview and make changes to your site for different device sizes. You can enable it by clicking on the responsive mode icons located at the lower left corner of the Elementor editor. By toggling between desktop, tablet, and mobile views, you can then check how your design looks on different devices.
- Use Responsive Columns and Widgets: While designing the pages with Elementor, always remember to use responsive columns and widgets. These columns and widgets of Elementor make sure that your design is responsive by dynamically adjusting their widths and arrangement against the screen size. Avoid using a fixed width on any component for it might sit improperly in display on smaller screens.
- Set Up Responsive Typography: Elementor affords you distinct font styles and sizes on any given dependent of device size. This makes sure that your text will appear well on and be readable by multiple ranges of screen sizes. Font options for every widget fall under the Style tab that you can alter.
- Optimize photos: Use Elementor’s responsive image feature to optimize your photos for the web. This feature lets you specify different image sizes and even aspect ratios so loading times are faster and visual appeal is maximized for all device sizes.
- Test and Preview: Always check if the pages you build for your website really look good and work across all platforms, i.e., preview in desktop, tablet, and mobile. Test the interactivity of menus, forms, and buttons on touchscreens as well.
- Keep on Testing Responsiveness: Keep on testing your responsive design as you do updates and changes on your website. Testing should be done frequently because sometimes those changes may alter the way a website looks on a particular device and needs to be readjusted some more with design or content.
- Think Accessibility: Other than responsiveness, think accessibility-considering font contrast, keyboard navigation, screen reader support, etc., to make sure everyone can use the website, regardless of their device or ability.